If you are craving the comfort of warm, cheesy garlic bread but want to stick to a wholesome, nutrient-dense lifestyle, meet your new favorite alternative. These Broccoli Cauliflower Cheese Sticks are the vibrant, veggie-packed cousins of traditional breadsticks, thoughtfully reimagined with a heart-healthy, Mediterranean diet twist. This dish strikes the perfect balance between indulgence and nutrition, combining a deeply savory vegetable-and-herb crust with a gooey, beautifully bubbled layer of melted mozzarella cheese on top.
What makes this particular recipe so exceptional is its text-perfect adaptation. By introducing a few smart, invisible ingredient swaps—like utilizing rich extra virgin olive oil, fragrant Mediterranean herbs, and a touch of savory Parmesan cheese—we elevate the depth of flavor without altering the classic, comforting presentation you know and love. Best of all, this recipe completely solves the number one complaint associated with vegetable-based crusts: the dreaded soggy, structural collapse. Our foolproof preparation method guarantees a sturdy, crispy slice every single time, making it an ideal choice for anyone following a low-carb, keto, or flexible plant-forward lifestyle.
2. Why You’ll Love This Recipe
- Naturally Low-Carb and Gluten-Free Adaptable: By swapping out refined grains for a vibrant base of cruciferous vegetables, these Broccoli Cauliflower Cheese Sticks dramatically reduce the glycemic impact while delivering a satisfying, bread-like texture.
- Mediterranean-Diet Friendly: Packed with rich antioxidants from cold-pressed extra virgin olive oil, aromatic green herbs, and a fiber-rich whole-grain or nut-flour binder, it honors authentic Mediterranean wellness principles.
- Kid-Approved Veggie Sneaking: The mild, sweet profile of cauliflower paired with familiar Italian herbs and golden, bubbly cheese creates a flavor profile that effortlessly wins over even the pickiest eaters at the dinner table.
- Make-Ahead and Freezer-Friendly: This recipe scales beautifully. You can easily par-bake the vegetable crust, freeze it, and add fresh toppings right before baking for an instant weeknight side dish.
- Guaranteed Crispy, Never Soggy: Thanks to our precise draining and drying technique, you can kiss flimsy, water-logged veggie crusts goodbye. These sticks hold their shape perfectly from pan to plate.
3. Ingredients You’ll Need
Creating the ultimate batch of crispy Broccoli Cauliflower Cheese Sticks relies on simple, wholesome ingredients combined in just the right proportions. Here is everything you will need to assemble the crust, toppings, and accompaniments:
For the Vegetable Crust Base:
- Broccoli Florets (3 cups, finely chopped): Provides a wonderful earthy note, structural integrity, and beautiful green flecks throughout the base.
- Cauliflower Florets (1 medium head, approx. 5 cups): The neutral, sweet canvas that builds a tender, dough-like foundation when processed.
- Large Egg (1): Acts as the primary binding agent, ensuring your vegetable base holds together perfectly during the initial bake.
- Whole Wheat Flour or Almond Flour (1 tablespoon): An invisible, unrefined upgrade from standard all-purpose flour that helps absorb lingering moisture and locks the crust structure in place.
- Dried Oregano & Dried Basil (1 ½ teaspoons total): The quintessential aromatic herbs that infuse the dough with robust, rustic Mediterranean flavor.
- Garlic Powder or Finely Minced Garlic (½ teaspoon): Delivers a sweet, pungent punch that mimics authentic garlic bread.
- Sea Salt (¼ teaspoon): Enhances the natural sugars of the roasted brassicas and balances the fats.
- Grated Parmesan Cheese (2 tablespoons): Folded directly into the base mixture to inject a sharp, umami depth that pays homage to traditional Italian cooking.
- Shredded Mozzarella Cheese (1 cup): Mixed into the dough to create an internal cheesy web that reinforces the stick’s structure.
For the Golden Topping:
- Shredded Mozzarella Cheese (1 cup): Placed exclusively on top of the par-baked crust to form a uniform, molten blanket that blisters beautifully under the broiler.
💡 Mediterranean Swap Tip To transform standard veggie cheese sticks into a Mediterranean masterpiece without modifying their gorgeous visual appeal, brush the parchment paper and the raw pressed crust lightly with premium extra virgin olive oil. This simple swap encourages deep caramelization, adds heart-healthy monounsaturated fats, and introduces a delicate fruitiness that pairs exquisitely with the hidden layer of grated Parmesan cheese.
Optional Dipping Accompaniments:
- Olive-Oil Infused Marinara Sauce: A robust, garlic-forward tomato sauce warmed gently for classic dipping.
- Lemon-Garlic Yogurt Dip: A cool, tangy Greek yogurt-based alternative flavored with fresh lemon juice, grated garlic, and a swirl of olive oil.
4. The #1 Secret to Crispy (Not Soggy) Sticks
If you have ever attempted to make a cauliflower or broccoli crust past, you might have asked yourself: why do my cauliflower cheese sticks fall apart? The answer almost always boils down to one hidden culprit: excess water. Both broccoli and cauliflower are composed of over 90% water. When exposed to the high heat of an oven, that moisture converts to steam, trapped beneath the cheese, resulting in a mushy, structurally weak mess.
To achieve a crispiness that rivals a traditional flour crust, a thorough moisture-removal process is absolutely non-negotiable.
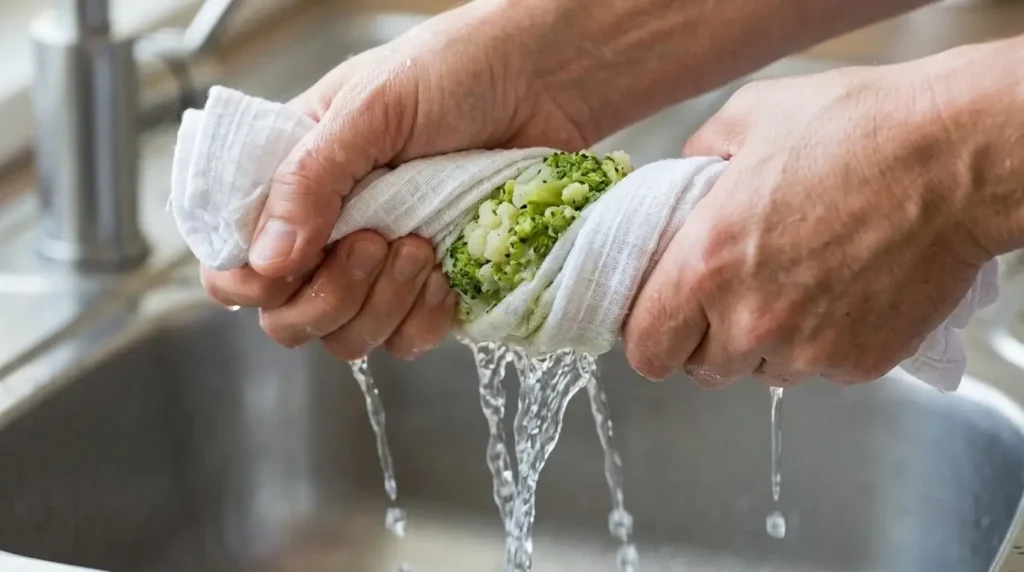
First, after boiling your florets, you must let them rest and drain in a colander, then spread them onto a baking sheet lined with thick paper towels or a clean kitchen towel for a full hour. This passive draining allows the residual heat to evaporate surface moisture naturally. Second, follow up with the squeeze-dry technique: gather the cooled veggies inside your kitchen towel, twist the top tightly, and exert firm pressure to wring out every last drops of water. You will be amazed at how much liquid escapes. Removing this moisture concentrates the natural flavors of the vegetables and ensures that the flour and egg can effectively bind the fibers, giving you clean, sliceable sticks that can hold up under a heavy layer of melted cheese.
5. Step-by-Step Instructions
Follow these precise steps to achieve a flawless, visually stunning result that matches our signature presentation perfectly.
Step 1: Cook and Passively Drain the Veggies
Bring a large pot of lightly salted water to a rolling boil. Add your 3 cups of chopped broccoli florets and 5 cups of cauliflower florets. Boil rapidly for exactly 5 minutes until they are fork-tender but not completely mushy. Drain immediately through a fine-mesh colander. Spread the steaming vegetables across a baking sheet lined heavily with paper towels or a clean, dry lint-free kitchen towel. Let them sit undisturbed for 1 hour. Before moving to the next step, gather the towel around the veggies and squeeze firmly over the sink to expel any stubborn, deep-seated moisture.
Step 2: Blend the Mediterranean Crust Mixture
Preheat your oven to 400°F (200°C). Line a shallow rectangular baking pan (measuring approximately 10.5 x 7 inches) with a sheet of high-quality parchment paper, allowing a little overhang on the sides for easy lifting later. Transfer your thoroughly dried, squeezed broccoli and cauliflower into a food processor or high-powered blender. Add the large egg, salt, your choice of whole wheat or almond flour, garlic, dried oregano, dried basil, the 2 tablespoons of grated Parmesan, and 1 cup of the shredded mozzarella cheese. Pulse the machine rhythmically until the ingredients are finely and uniformly chopped. Aim for a textured, cohesive dough consistency—do not over-process into a smooth puree.
Step 3: Press and Par-Bake the Crust
Transfer the emerald-flecked veggie dough into the center of your prepared, parchment-lined baking pan. Using a flexible silicone spatula or the palms of your hands, press the mixture firmly and evenly into the corners of the pan, smoothing the surface into a neat, uniform rectangle about half an inch thick. Lightly brush or spray the surface with extra virgin olive oil. Place the pan on the center rack of your preheated oven and bake for 20 minutes. When done, the edges should be visibly set, dry to the touch, and turning a beautiful light golden-brown color.
Step 5: Slice and Serve
Remove the pan from the oven and place it on a heat-safe surface. Allow it to cool undisturbed for 5 minutes; this brief resting window allows the veggie proteins and melted cheeses to set firmly, which ensures clean cuts. Grasp the edges of the parchment paper overhang and carefully lift the entire baked rectangle out of the pan, transferring it smoothly onto a rustic wooden cutting board. Using a long, sharp chef’s knife or a heavy pizza cutter, slice the block evenly down the center lengthwise, then cut across horizontally to create approximately 14 neat, uniform rectangular sticks. Serve immediately while hot and stretchy, accompanied by a bowl of warm marinara or a side of cool lemon-garlic yogurt dip.
6. Recipe Card
Here is the clean, structured data breakdown ready to be inserted directly into your website’s recipe schema plugin:
7. Expert Tips for Success
- Never Skimp on the Draining and Squeezing Steps: It bears repeating—moisture is the absolute enemy of a crisp vegetable crust. If the towel feels instantly soaked when squeezing your veggies, switch to a fresh, dry towel and squeeze a second time.
- Shred Fresh Block Mozzarella at Home: Pre-packaged shredded cheeses are coated in potato starch or cellulose to prevent clotting. This coating prevents the cheese from melting into that beautifully fluid, cohesive, and perfectly bubbled blanket seen in professional food photography.
- Press the Dough Thinly and Uniformly: When formatting the crust in your pan, check that the center is just as thin as the outer edges. An unevenly thick center will remain soft and doughy, preventing you from cleanly lifting the sticks.
- Keep an Absolute Watch While Broiling: Oven broilers can go from beautifully speckled gold to completely charred in a matter of seconds. Do not walk away from the oven during those final 1–2 minutes of cooking.
8. Variations & Substitutions
The Gluten-Free & Keto Configuration
To make this recipe entirely gluten-free and compliant with a strict ketogenic lifestyle, simply swap out the single tablespoon of whole wheat flour for an equal amount of finely ground blanched almond flour or coconut flour. Almond flour provides excellent structure and pairs wonderfully with the nutty notes of the melted Parmesan cheese in the crust base.
Elevated Mediterranean Additions
If you want to inject an extra burst of regional flare without disrupting the pristine, golden mozzarella canvas on top, consider folding a teaspoon of fresh lemon zest directly into the veggie dough during the processing stage. Alternatively, you can dust the finished, hot cheese sticks with a light sprinkle of wild za’atar or serve them alongside a small bowl of crumbled authentic Greek feta cheese.
Spicy Arrabbiata Twist
For those who enjoy a touch of fiery heat, add half a teaspoon of crushed red pepper flakes into the food processor with the herbs, or dust them lightly over the cheese topping right before the broiling stage.
The 15-Minute Air Fryer Shortcut
If you are short on time or want an even crispier crunch, you can easily adapt this recipe for your air fryer. After processing your veggie dough, shape it into smaller, individual rectangular patties or free-form sticks about 1/2-inch thick. Line your air fryer basket with a fitted piece of perforated parchment paper. Spritz the basket with olive oil, arrange the sticks in a single, un-crowded layer, and air fry at 375°F (190°C) for 10 to 12 minutes until firm. Carefully flip them over, scatter a generous handful of mozzarella cheese on top, and air fry for an additional 3 minutes until the cheese is completely melted, golden, and bubbly.
9. What to Serve With It / Dipping Sauces
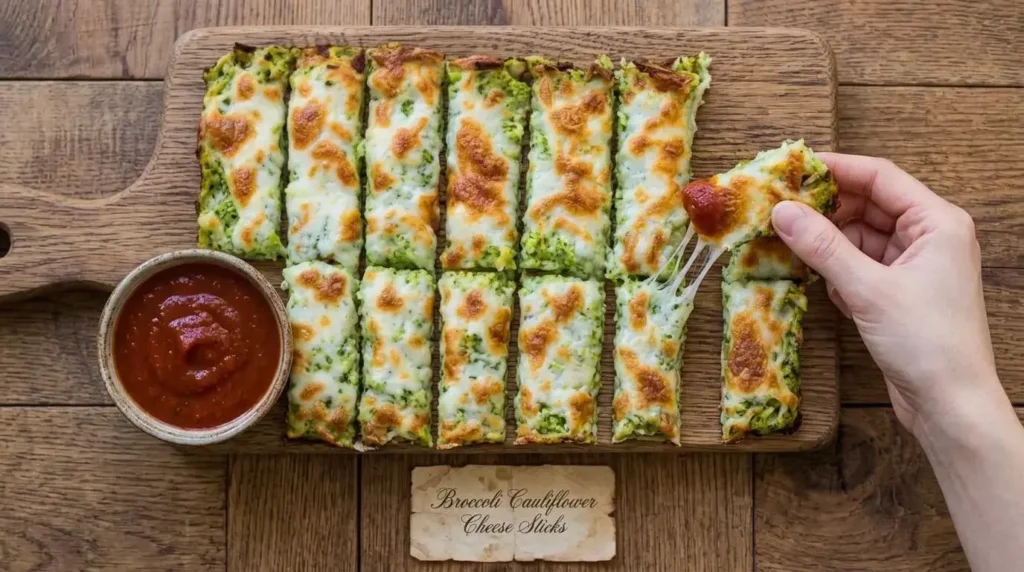
To round out your dining experience, pair your Broccoli Cauliflower Cheese Sticks with exceptional dipping sauces that echo Mediterranean traditions.
The first classic choice is a rustic, olive-oil-based marinara sauce. Seek out a brand that leads with rich olive oil, whole crushed San Marzano tomatoes, and plenty of sautéed garlic, rather than varieties loaded with added corn syrups or processed sugars.
For a true Mediterranean contrast, whip up a batch of cool lemon-garlic yogurt dip. The refreshing acidity of strained Greek yogurt cuts through the richness of the melted mozzarella topping beautifully, adding a gut-healthy probiotic boost to your plate.
If you love crisp, oven-baked vegetable sides, these cheese sticks serve as a fantastic alternative to our popular Baked Parmesan Zucchini Rounds, offering a completely different texture while keeping your meal low in refined carbohydrates. They also function beautifully as a nourishing side dish alongside a fresh Mediterranean chopped salad, a steaming bowl of rustic lentil soup, or as an accompaniment to a fun, family pizza night.
10. Storage & Reheating
Refrigerating Leftovers
Should you find yourself with leftover cheese sticks, allow them to cool completely to room temperature first. This prevents steam from condensing inside your container, which would soften the crispy bottom. Arrange the sticks in a single layer inside a shallow airtight container, or separate stacked layers with sheets of parchment paper. Store in the refrigerator for up to 3 days.
Long-Term Freezing Instructions
These veggie sticks freeze beautifully. For the best results, we recommend freezing them right after the initial par-baking step (Step 3). Allow the un-cheesed vegetable block to cool completely, wrap it tightly in plastic wrap followed by a layer of aluminum foil, and store it flat in your freezer for up to 1 month. When ready to enjoy, bake from frozen at 400°F (200°C) for 10 minutes, add your fresh mozzarella topping, and proceed with the standard baking and broiling steps.
Reheating for Maximum Crispiness
To revive that perfect, just-baked crunch, avoid the microwave at all costs, as it will turn the vegetable base soft and rubbery. Instead, place your chilled sticks onto a parchment-lined baking sheet and warm them in a preheated oven at 375°F (190°C) for 6 to 8 minutes. Alternatively, pop them into an air fryer basket at 350°F (175°C) for 3 to 4 minutes until the mozzarella top re-liquefies and the underside turns satisfyingly crisp once more
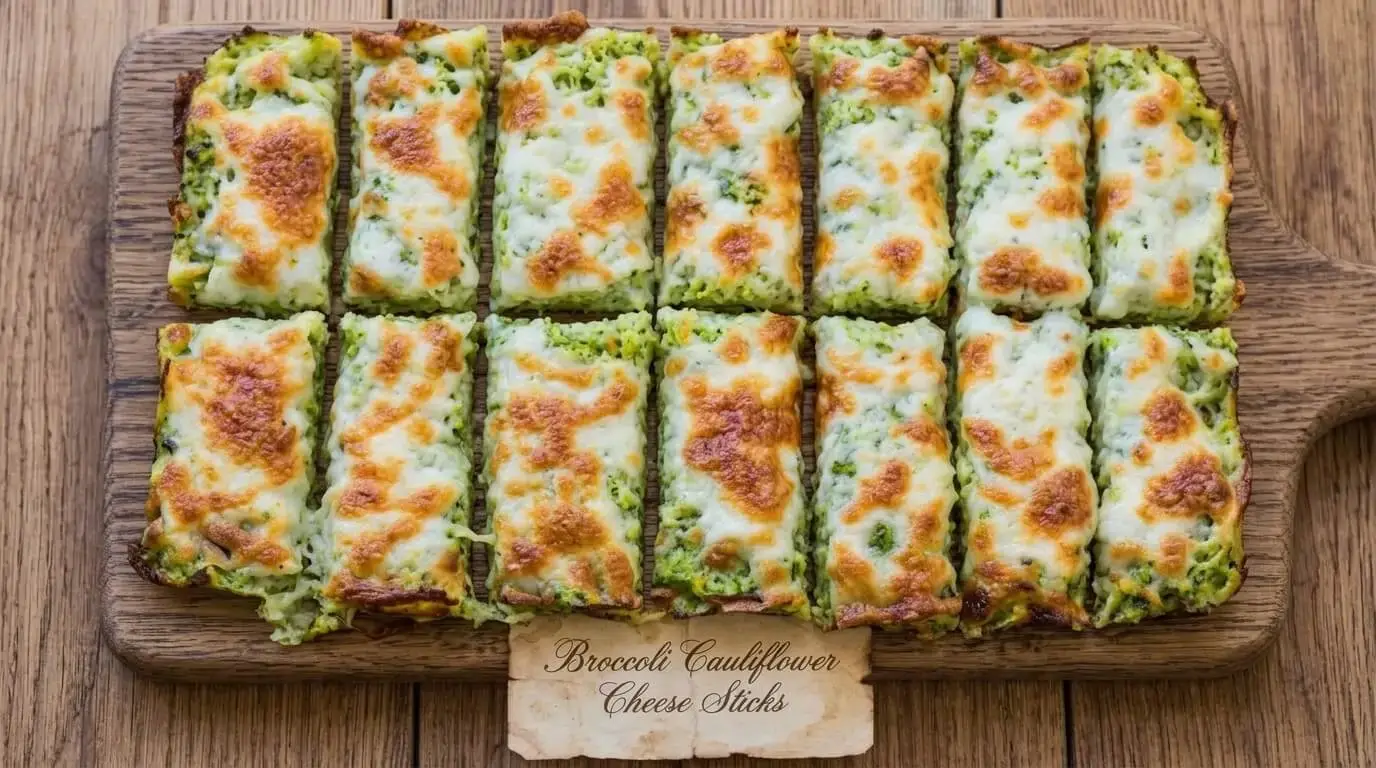
Broccoli Cauliflower Cheese Sticks
Ingredients
Method
- Bring a large pot of water to a rolling boil. Add the chopped broccoli and cauliflower florets. Cook for 5 minutes, then drain thoroughly into a colander.
- Spread the hot, drained vegetables evenly over a baking sheet lined with thick paper towels or a clean kitchen towel. Allow them to air-dry and cool completely for 1 hour.
- Gather the edges of the towel around the cooled vegetables, twist tightly, and press forcefully to squeeze out any remaining liquid into the sink.
- Preheat your oven to 400°F (200°C). Line a 10.5 x 7-inch baking pan with parchment paper, leaving a bit of overhang on the sides.
- Place the dry veggies, egg, flour, dried herbs, garlic powder, sea salt, grated Parmesan, and 1 cup of the shredded mozzarella into a food processor. Pulse until finely minced and cohesive, ensuring it maintains a textured feel.
- Spread the veggie dough into the prepared pan. Press firmly and evenly with your fingers or a spatula to form a uniform rectangle. Lightly brush the top with a teaspoon of extra virgin olive oil.
- Bake the crust in the center rack for 20 minutes until the structure feels firm and the borders show a light golden tint.
- Remove the pan from the oven. Scatter the remaining 1 cup of shredded mozzarella cheese across the top in an even layer. Return to the oven for 10 minutes until melted. Turn the oven setting to Broil for 1 to 2 minutes until the cheese is beautifully speckled with deep golden bubbles.
- Allow the pan to sit for 5 minutes at room temperature. Carefully lift the parchment paper out onto a wooden board. Use a sharp knife to cut the block down the center lengthwise, then slice crosswise into roughly 14 clean, rectangular sticks. Serve warm with your preferred dip.
Notes
* If using frozen broccoli or cauliflower, ensure they are fully thawed and extra care is taken during the towel-squeezing stage, as frozen vegetables absorb significantly more water during processing.
11. FAQ Section
Why do my broccoli cauliflower cheese sticks fall apart?
Vegetable-based cheese sticks typically fall apart due to trapped moisture inside the broccoli and cauliflower cells. If the vegetables are not dried thoroughly after boiling, that hidden liquid turns to steam during baking, breaking down the binding power of the egg and flour. Always follow the 1-hour draining period and squeeze the vegetables firmly inside a clean kitchen towel before blending.
Can I use frozen broccoli/cauliflower?
Yes, you can absolutely use frozen florets for convenience. However, because frozen vegetables are blanched before flash-freezing, their cellular structures are fractured, causing them to release significantly more water upon thawing. Thaw them completely in the fridge overnight, steam or boil them briefly, and perform an extra-thorough towel-squeezing step to ensure your crust doesn’t become soggy.
Can I make these ahead of time or freeze them?
Yes! You can bake the emerald vegetable crust base ahead of time, let it cool, cover it, and keep it in the fridge for up to 24 hours before adding the cheese topping. For longer storage, freeze the par-baked crust flat for up to a month, then add fresh cheese and bake directly from frozen when a craving strikes.
Are these keto/low-carb friendly?
Absolutely. Traditional breadsticks are loaded with refined white flour that spikes blood sugar. By utilizing fiber-rich broccoli and cauliflower as the base and swapping standard flour for almond flour, these sticks contain just about 2.5 grams of net carbs per piece, making them perfectly compliant with ketogenic and low-carb lifestyles.
Can I make them in the air fryer?
Yes, this recipe adapts seamlessly to an air fryer. Shape the blended veggie dough into smaller individual rectangular portions, place them over perforated parchment paper in your fryer basket, cook at 375°F (190°C) for about 10–12 minutes until set, then top with mozzarella and fry for another 3 minutes until bubbling.
Is this recipe Mediterranean-diet friendly?
Yes, it is beautifully tailored to the Mediterranean diet. Instead of using refined grains, it emphasizes whole vegetables, uses heart-healthy extra virgin olive oil to crisp the crust, incorporates aromatic green herbs like oregano and basil, and features high-quality, real cheeses in moderation rather than heavily processed dairy products.
12. Closing/CTA
We hope you fall in love with these crispy, golden, and entirely satisfying Broccoli Cauliflower Cheese Sticks! They are proof that you never have to sacrifice flavor or texture when fueling your body with wholesome, veggie-forward ingredients. If you give this recipe a try, please leave a star rating and a comment below to let us know how your crust turned out or what dipping sauces your family loved most. Your feedback helps our community thrive!
If you are looking for more innovative, vegetable-centered comfort dishes to round out your weekly menu, be sure to check out our deliciously savory Zucchini Pizza Casserole for another low-carb crowd-pleaser, or explore the deep, caramelized flavors of our stunning Roasted Cauliflower Steak with Almond Chimichurri. Happy cooking!