If you are searching for the ultimate crowd-pleasing dessert that requires zero oven time and delivers pure indulgence, look no further than this Chocolate Peanut Butter Tiffin Bars Recipe. Perfect for busy weekdays, holiday platters, or weekend gatherings, this dish brings together a rich and fudgy texture with an incredibly easy preparation method. Tiffin bars are a quintessential no-bake convenience food, requiring absolutely no oven time while providing a sophisticated flavor profile. By combining a decadent chocolate and peanut butter base with a Mediterranean-inspired conscious approach to ingredients, this family-friendly treat elevates the classic British bake sales staple into something truly spectacular. Whether you need a perfect make-ahead dessert for an upcoming potluck or simply want to satisfy a deep sweet tooth, this recipe delivers maximum satisfaction with minimal kitchen effort.
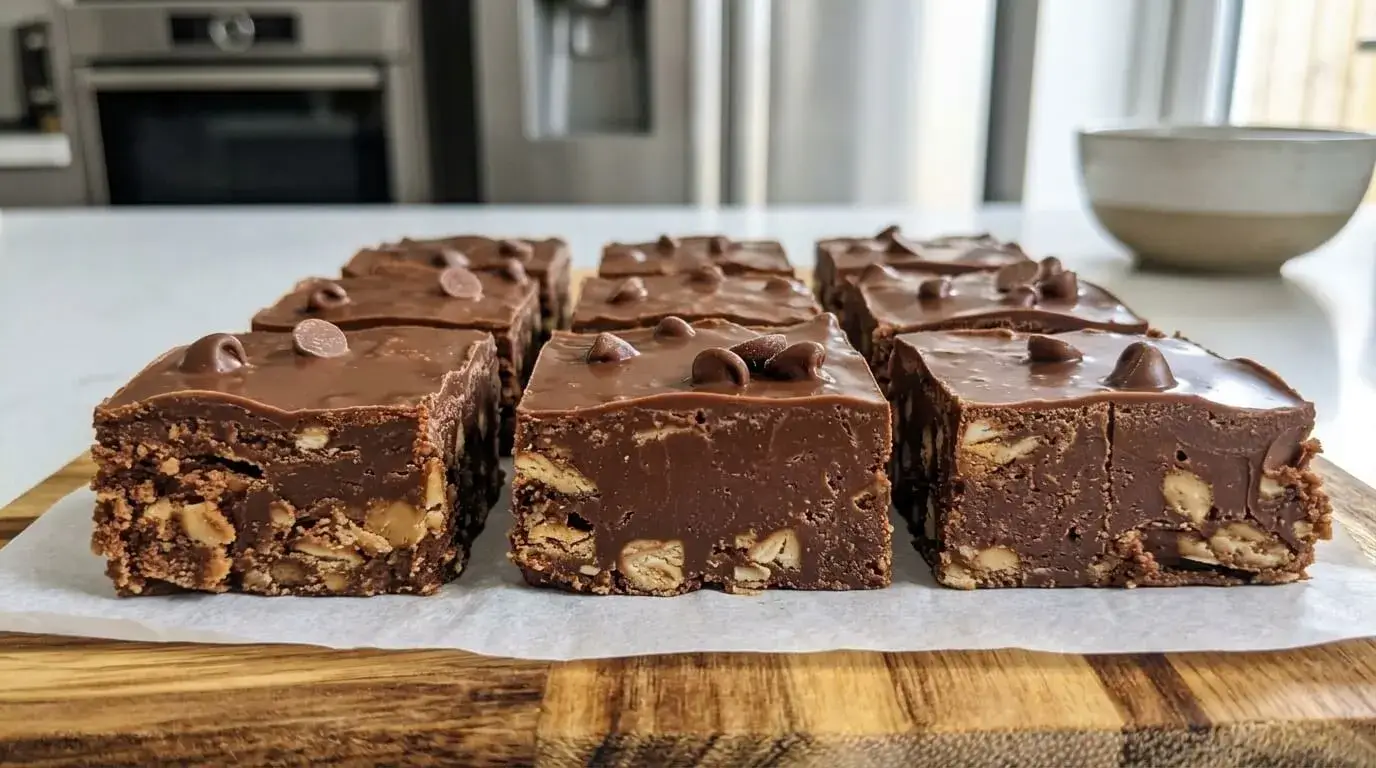
Featured Snippet Chocolate Peanut Butter Tiffin Bars are a rich no-bake dessert made with peanut butter, chocolate, crushed biscuits, and chopped peanuts. The mixture is pressed into a pan, topped with a smooth chocolate layer, chilled until firm, and sliced into fudgy bars that are perfect for make-ahead entertaining or everyday treats.
What Are Chocolate Peanut Butter Tiffin Bars?
To understand why this dessert is sweeping across recipe platforms, it helps to look at its historic roots. Originating in Troon, Scotland, in the early 20th century, the traditional tiffin was conceived as a portable, dense sweet treat packed with dried fruits, biscuits, and cocoa powder. Over the decades, it transformed into a staple of British tea culture, closely related to what many modern bakers refer to as a fridge cake recipe or a classic chocolate biscuit cake.
┌────────────────────────────────────────────────────────┐
│                   THE EVOLUTION OF TIFFIN              │
├───────────────────────────┬────────────────────────────┤
│     Traditional Tiffin    │    Modern Peanut Butter    │
├───────────────────────────┼────────────────────────────┤
│ • Cocoa Powder Base       │ • Creamy Peanut Butter Base│
│ • Raisins & Sultanas      │ • Roasted Crunchy Peanuts  │
│ • Standard Tea Biscuits   │ • Whole Grain Biscuits     │
│ • Thin Chocolate Top      │ • Fudgy, Melted Layer      │
└───────────────────────────┴────────────────────────────┘
The defining difference between a classic tiffin and traditional baked dessert bars lies in the cooking technique. Traditional bars rely on eggs, flour, and leavening agents baked in an oven to create structure. In contrast, no bake tiffin bars rely on the solidification of fats—specifically butter, peanut butter, and melted chocolate—to bind crushed biscuits together into a firm, sliceable confection. This method preserves the distinct, crunchy texture of the biscuit pieces within an ultra-dense, fudgy matrix, creating a multi-textured experience that baking often softens. Across the United Kingdom, it remains a nostalgic favorite, beloved for its rustic presentation and customizable nature.
Why You’ll Love This Chocolate Peanut Butter Tiffin Bars Recipe
- No Baking Required: Keep your kitchen cool; this entire process relies on simple stovetop or microwave melting and refrigerator setting.
- Rich Chocolate Flavor: A luxurious chocolate layer anchors the treat, ensuring every bite satisfies chocolate lovers.
- Creamy Peanut Butter: The base blends decadent butter with smooth nut paste, creating an unmistakable, melt-in-your-mouth quality.
- Crunchy Biscuit Texture: Coarsely broken biscuits offer an incredible textural contrast to the silky chocolate topping.
- Make-Ahead Friendly: Prepare it up to a week in advance; it sits beautifully in the fridge until your guests arrive.
- Freezer-Friendly: These bars lock in flavor flawlessly when frozen, making them perfect for long-term snack storage.
- Simple Pantry Ingredients: No specialty trips required; you likely have the biscuits, chocolate chips, and nut butter in your cupboard right now.
Ingredients You’ll Need
For The Fudgy Base
- Unsalted Butter (1 cup / 226g): Melted down to act as the primary fat binder, adding a rich, velvety mouthfeel to the base layer.
- Creamy Peanut Butter (1¼ cups / 330g): Provides the foundational structural creaminess and deep nutty flavor profile that defines the bar.
- Powdered Sugar (1¾ cups / 210g): Sweetens the base while dissolving effortlessly into the fat mixture, ensuring a smooth, non-gritty texture.
- Graham Crackers or Digestive Biscuits (2 cups / 240g): Coarsely crushed to supply the iconic tiffin crunch. Using whole-grain varieties adds a rustic charm.
- Roasted Peanuts (½ cup / 75g): Finely chopped to provide an extra layer of texture and intensify the nutty profile.
For The Chocolate Topping
- Milk or Semi-Sweet Chocolate Chips (1½ cups / 270g): The star of the sleek, glossy chocolate topping. High-quality chips ensure a smooth melt.
- Creamy Peanut Butter (¼ cup / 66g): Mixed into the melting chocolate to prevent the top layer from becoming too brittle, ensuring a soft, clean cut.
- Extra Chocolate Chips: Reserved for garnishing the top surface to give it a beautiful visual texture.
How To Make Chocolate Peanut Butter Tiffin Bars
Step 1 – Prepare The Pan
Line an 8×8-inch square baking dish with high-quality parchment paper. Ensure you leave a 2-inch overhang on at least two opposing sides. This overhang creates a sling, allowing you to lift the fully chilled chilled dessert block out effortlessly without scratching your pan or damaging the edges of your bars.
Step 2 – Mix The Peanut Butter Base
In a large, heatproof mixing bowl, whisk together your melted unsalted butter and 1¼ cups of the creamy peanut butter until completely smooth and emulsified. Gradually sift in the powdered sugar, stirring continuously to prevent clumping. Once smooth, fold in the coarsely crushed digestive biscuits (or graham crackers) and the chopped roasted peanuts. Stir with a sturdy spatula until every single biscuit crumb is coated in the glistening peanut butter mixture.
Step 3 – Press Into The Pan
Tip the thick, textured base mixture into your prepared 8×8-inch pan. Using the bottom of a flat measuring cup or a metal offset spatula, press the mixture firmly down into the corners. It must be compressed tightly; an uncompressed base will crumble into pieces when sliced later. Aim for a flat, completely even surface, then place the pan into the refrigerator to firm up while you prepare the next layer.
Step 4 – Make The Chocolate Layer
In a medium microwave-safe bowl, combine your chocolate chips with the remaining ¼ cup of peanut butter. Microwave on medium power in 30-second intervals. Remove and stir thoroughly after each interval. This distribution of heat prevents the chocolate from scorching. Once the mixture is completely melted, glossy, and uniform, it is ready.
Step 5 – Chill Until Firm
Pour the melted chocolate topping over the chilled peanut butter base. Use your spatula to guide the chocolate into all four corners, smoothing the top into a mirror-like finish. While the chocolate is still warm and liquid, evenly scatter your extra chocolate chips across the surface, matching the look of a premium artisan bakery treat. Place the pan back flat into the refrigerator and let it chill undisturbed for at least 2 hours, or until the top layer has completely set.
Step 6 – Slice And Serve
Once firmly set, run a thin knife along the unlined edges of the pan. Grab the parchment paper overhang and lift the entire block cleanly onto a wooden cutting board. Let it sit at room temperature for 5 to 10 minutes to take the chill off the chocolate. Using a long, sharp chef’s knife wiped with a warm, damp cloth, make clean, decisive cuts into equal squares. Wipe the blade clean between every single cut to ensure immaculate, photo-ready edges.
┌────────────────────────────────────────────────────────┐
│                TROUBLESHOOTING SLICING ISSUES          │
├───────────────────────────┬────────────────────────────┤
│          Symptom          │           Fix              │
├───────────────────────────┼────────────────────────────┤
│ Top chocolate shatters    │ Let sit out for 10 mins;   │
│                           │ use a hot, dry knife.      │
├───────────────────────────┼────────────────────────────┤
│ Layers separate entirely  │ Score the top chocolate layer│
│                           │ before it fully sets.      │
├───────────────────────────┼────────────────────────────┤
│ Crumbly, messy cuts       │ Press the base layer much   │
│                           │ harder into pan next time. │
└───────────────────────────┴────────────────────────────┘
Expert Tips For Perfect Tiffin Bars
- Use Natural Peanut Butter Wisely: If using a natural nut butter, ensure it is thoroughly stirred before measuring. Separated, oily peanut butter can prevent the base from setting correctly, leading to greasy, soft bars.
- Don’t Crush The Biscuits Too Fine: Avoid using a food processor to powder your biscuits. You want distinct, gravel-sized chunks ranging from pea-sized to half-inch pieces. This structural variety provides the classic tiffin cross-section and necessary bite.
- Chill Completely Before Slicing: Cutting too early results in bleeding layers. Give the fats ample time to form crystalline bonds in the cold refrigerator, stabilizing the fudge matrix.
- Use A Warm Knife For Clean Cuts: Dip your blade into a tall container of hot water, dry it thoroughly with a clean towel, and slice. The heat melts through the chocolate top like butter, preventing cracking.
- Line The Pan Properly: Never skip the parchment paper sling. Greasing the pan alone is insufficient for a no-bake cake, as the dense base bonds strongly to container walls when chilled.
Variations And Substitutions
Dark Chocolate Version
For a less intensely sweet, adult-oriented option, swap the milk chocolate chips for a high-percentage dark chocolate (60% to 72% cacao). The bitter undertones of cacao contrast brilliantly against the sweet, salty profile of the inner peanut butter fudge.
Crunchy Peanut Butter Version
If you prefer an aggressive, textured crunch over a smooth interior, simply exchange the creamy style for an equal amount of crunchy peanut butter in the base layer. This infuses the bars with tiny, crackly nut fragments throughout.
Almond Butter Version
For individuals with peanut allergies or those seeking an alternative flavor note, replace all peanut butter with premium, well-stirred almond butter. Pair this variation with chopped roasted almonds in the base layer for an elegant, earthy taste.
Gluten-Free Version
Transform this into a gluten-safe no bake dessert bars option by utilizing certified gluten-free graham style or digestive style biscuits. The binding characteristics of the fats remain completely identical.
Mediterranean-Inspired Version
Incorporate Mediterranean flair into your peanut butter dessert bars by opting for premium whole grain biscuits, high-cocoa dark chocolate, and a pinch of flaky sea salt harvested from Mediterranean coastal waters sprinkled right over the chocolate glaze.
Are Chocolate Peanut Butter Tiffin Bars Mediterranean Diet Friendly?
While a chocolate peanut butter tiffin is undeniably a dessert, it can easily fit into a balanced, health-conscious lifestyle when prepared thoughtfully. The key lies in ingredient selection and portion control.
By selecting dark chocolate rich in polyphenols and antioxidants, you align your sweet treats with the heart-healthy ethos of Mediterranean food cultures. Furthermore, utilizing high-quality peanuts and natural nut butter introduces a wealth of monounsaturated fatty acids, plant-derived proteins, and dietary fiber.
Choosing a robust whole grain biscuits option increases the complex carbohydrate content, slowing digestion and preventing rapid blood sugar spikes. In the Mediterranean lifestyle, desserts are not strictly forbidden; instead, they are enjoyed mindfully, focused on quality ingredients, and shared among friends and family at the end of a wholesome meal. If you love balancing chocolate with wholesome components, you might also enjoy exploring our Chocolate Zucchini and Oat Muffins for your weekly meal prep.
How To Store And Freeze Tiffin Bars
Refrigerator Storage
Keep your refrigerator bars tucked inside a completely airtight container, separating any stacked layers with sheets of parchment paper to prevent them from fusing. Stored properly, they maintain peak freshness and structural integrity for up to 2 weeks.
Freezer Storage
This is a highly freezer friendly dessert. Wrap individual pre-sliced squares tightly in plastic wrap, then place them inside a heavy-duty freezer bag. They freeze beautifully for up to 3 months.
Make Ahead Instructions
Because this dessert requires a mandatory chilling window and does not stale like traditional flour-based baked goods, it is an ideal candidate for entertaining. Prepare the entire tray 48 hours before your event, keeping it unsliced in the refrigerator until serving day.
Best Containers
Glass or BPA-free rigid plastic storage containers with snap-locking lids offer the best protection against absorbing any stray odors from your refrigerator or freezer environments.
Chocolate Peanut Butter Tiffin Bars
Ingredients
Method
- Line an 8×8-inch square baking dish with parchment paper, leaving a 2-inch overhang on the sides for easy removal later.
- In a large bowl, mix the melted unsalted butter and 1 1/4 cups of creamy peanut butter until completely smooth. Stir in the powdered sugar, coarsely crushed biscuits, and chopped peanuts until fully combined and coated.
- Transfer the mixture into your prepared pan. Press it down using a flat object into a firm, flat, and completely even layer. Refrigerate while preparing the topping.
- In a microwave-safe bowl, combine 1 1/2 cups chocolate chips with the remaining 1/4 cup of peanut butter. Microwave in 30-second intervals, stirring well in between, until completely melted and glossy.
- Pour the smooth chocolate topping over the firm biscuit base layer, spreading it evenly into corners. Sprinkle the extra chocolate chips evenly across the surface.
- Refrigerate for at least 2 hours until fully set. Use the parchment paper overhang to lift the bars cleanly out, and slice into squares using a warm, sharp knife.
Notes
– For a less sweet version, use dark chocolate chips (60-72% cacao) for the topping.
– Store in an airtight container in the refrigerator for up to 2 weeks, or freeze for up to 3 months.
Common Mistakes To Avoid
- Bars Too Soft: This occurs when the butter wasn’t fully incorporated or the chilling time was cut short. Ensure you respect the minimum 2-hour cooling window.
- Chocolate Layer Cracking: Melting chocolate without adding a small amount of peanut butter or fat makes the top shell glass-hard. The added nut butter ensures the topping remains yields cleanly under pressure.
- Base Falling Apart: If your biscuit pieces are too large or you failed to compress the mixture with enough force into the pan, air pockets will form, causing the bars to crumble upon slicing.
- Overheating Chocolate: Applying direct, intense heat causes chocolate proteins to clump and separate, transforming a silky glaze into a grainy, matte paste. Always use gentle, pulsed microwave heat.
- Uneven Layers: Pouring your chocolate over an uneven, un-leveled base creates pools of thick topping in some areas and paper-thin sections in others. Take time to level your base.
Frequently Asked Questions
What are tiffin bars made of? They consist of a non-baked base of melted butter, sweeteners, cocoa or nut butters, and crunchy elements like broken biscuits, nuts, or dried fruits, finished with a smooth chocolate top coat.
Do tiffin bars need refrigeration? Yes, because they lack baked flour or egg structures, they rely entirely on cool temperatures to remain firm and stable. They will soften significantly if left out in a warm room.
Can you freeze chocolate peanut butter tiffin bars? Absolutely. They retain their fudgy texture remarkably well when frozen. Simply thaw them in the fridge for an hour before enjoying.
What’s the difference between tiffin and chocolate biscuit cake? While exceptionally similar, a tiffin typically incorporates a higher ratio of bound fats, sugars, and extra texturizers like nuts directly into the base mass, whereas a classic biscuit cake focuses primarily on suspended biscuit chunks within a liquid chocolate ganache.
Can I use crunchy peanut butter? Yes, swapping smooth for crunchy works perfectly and introduces a delightful, crackly nut texture to the interior fudge base.
Can I make them without peanuts? Yes, replace the peanuts with sunflower seed butter or almond butter, and exchange the chopped peanuts for rolled oats or toasted pumpkin seeds.
How long do tiffin bars last? They last beautifully for up to 14 days when kept refrigerated in an airtight container, or up to 3 months frozen.
Can I use digestive biscuits instead of graham crackers? Yes, they are completely interchangeable in this recipe. Digestive biscuits provide a slightly more traditional, buttery British tiffin texture, while graham crackers offer a classic honeyed sweetness.
Serving Suggestions
To create an unforgettable dessert experience, serve these rich bars alongside an intense, bitter drink to cut through the fudginess. They pair exquisitely with a dark roast Mediterranean espresso, a robust Turkish coffee, or a steaming cup of Earl Grey tea. If you’re looking for lighter, fruit-centric options to balance out a dessert spread, our Honey Pistachio Ricotta Stuffed Dates make a phenomenal addition. For casual snacking alongside wholesome baked goods, you can also consider pairing them on a platter with Banana Chia Oat Cookies.
                       ┌──────────────────────┐
                       │   PERFECT PAIRINGS   │
                       └──────────┬───────────┘
                                  │
         ┌────────────────────────┼────────────────────────┐
         ▼                        ▼                        ▼
  [Hot Beverages]         [Fresh Fruits]           [Occasions]
  • Espresso              • Raspberries            • Holiday Trays
  • Turkish Coffee        • Strawberries           • Summer Potlucks
  • Dark Roast Tea        • Blackberries           • Make-Ahead Teas
Arranged neatly on a slate platter with fresh raspberries, strawberries, or blackberries, these bars instantly transform into an elegant holiday dessert tray centerpiece or a popular potluck contribution. Because they are so rich, cutting them into small, bite-sized squares makes them an incredibly efficient option for hosting large groups.
Conclusion
Mastering this incredible Chocolate Peanut Butter Tiffin Bars Recipe gives you an effortlessly impressive, no-bake weapon in your culinary arsenal. It brilliantly combines the nostalgic simplicity of a classic British fridge cake with the timeless, decadent pairing of chocolate and peanut butter. By opting for high-quality components and serving them mindfully, this recipe proves that rich treats can easily find a welcome home within a balanced, Mediterranean-inspired lifestyle. Give this easy, no-bake masterpiece a try this week, share it with the people you love, and enjoy the absolute luxury of a premium dessert without ever turning on your oven.